7 boo-boos to avoid on the way to the Philippines

From the United States, three weeks seemed enough time to explore my roots, meet artists, arrange my mother’s veteran’s spousal benefits and hold a few exploratory business meetings. However, eight weeks later, what was actually accomplished was very different from my original list.
In the process, I learned how to live and make my way around Metro Manila. Before sharing tips on living in one of the most populous cities of Southeast Asia, here are seven things NOT to do on your way to the Philippines.
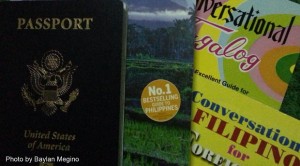
1. Don’t wait until the last minute to get your papers in order. I learned this the hard way. My departure was moved forward several weeks, so I couldn’t wait for my passport to be processed by mail. A passport is needed to apply for a Philippine visa. It took two days for me to gather and personally submit the official documents required (https://travel.state.gov/content/passports/english/passports.html). (Note: Because my name had changed after my divorce, I had to provide divorce/court documents, or a number of statements or bills going back a few years with my “new” name.) Several companies will charge more than $200 to handle expedited processing, in addition to the government’s regular and expedited passport fees. I opted to save that money for travel expenses. Of course, there still was an expedited processing fee, and it took several days for my passport to be ready. Advice: Submit your passport application at least eight weeks in advance.
2. Don’t buy a one-way ticket. This seems straightforward, but because I didn’t know how long it would take to handle my mother’s affairs, I bought a one-way ticket. To receive a visa, the folks at the Philippine Consulate needed a document that showed I intended to return to the U.S. I spent a few hours finding a travel agent who could provide an acceptable document. Advice: Buy your round-trip ticket and be ready to show proof of travel plans.
3. Don’t sleep in when you’re going to the Consulate. Generally, in San Francisco at least, documents submitted to the Philippine Consulate early in the morning are ready for pickup in the afternoon. You may get lucky and have your documents out before noon. If you arrive after lunch, expect to pick up the next day. Requirements for a Non-Immigrant Visa are at https://www.philippinessanfrancisco.org/philippines-sf/consular-services-sf/. It’s a good idea to get at least four 2”x2” pictures of yourself. Advice: Submit your paperwork in the morning.
Article continues after this advertisement4. Don’t assume you can get your shots in one day. I waited until the week before departure to get shots. Because I was planning to go to the mountains and be off the regular tourist routes, I could be exposed to more diseases than a tourist staying in protected westernized hotels. There were several shots I should have had (https://www.mdtravelhealth.com/destinations/asia/philippines.php). As it turned out, a few needed to be administered over several weeks to be effective. I didn’t have that long, so I had to skip them. Advice: Visit your doctor or clinic four to eight weeks prior to departure to get the full schedule of shots needed.
Article continues after this advertisement5. Don’t follow the herd. Last time I went through Philippine Immigration, there were three lines: Returning Philippine Citizens (RPC – far left lines); Overseas Workers (next to RPC); and Visitors. I made the mistake of getting into the shortest line, only to find out 30 minutes later that I was in the wrong one. Advice: Pay attention to the lines at Immigration.
6. Don’t forget to convert some U.S. dollars. Figure on an exchange rate of US$1 to PhP40. You might be able to change money at the airport, however your exchange rates won’t be to your advantage. If no one is picking you up at the airport, expect to spend at least PhP400 for a taxi. You’ll need tip money for anyone providing any kind of service outside the airport. Advice: Convert at least US$50 into Philippine pesos for your first day.
7. Don’t arrive without goodies. Known as “pasalubong,” it’s nice but not expected to give small gifts to anyone hosting you during your travels. Don’t forget to bring small gifts from home. Advice: Buy duty-free gifts ranging from small Toblerone chocolates to liquor and jewelry at the airport before departure or in-flight. You also can pick up pasalubong on arrival, in the duty-free shop outside the baggage claim area. When you arrive, be ready to slow down and learn how to flow.